
Homemade 40th Birthday Party Invitations

📖 Table of Contents
- Why Homemade Invitations Are a Game-Changer for 40th Birthday Parties
- How to Create a Hand-Stamped Invitation in 3 Steps
- How to Add a Personal Touch to Each Invitation
- How to Fold and Seal Your Invitations
- How to Store and Reuse Your Invitations
- Make It Your Way
- Frequently Asked Questions
- The Printable Party Plan
I still remember the look on my friend’s face when I handed her a handcrafted 40th birthday party invitation that smelled like lavender and looked like a tiny treasure box. It was the kind of invitation that made you pause, take it in, and feel the weight of the occasion before even opening it. For someone’s 40th birthday, the invitation isn’t just a piece of paper — it’s a first impression that sets the tone for the entire event. Homemade 40th birthday party invitations, when done well, are a labor of love, a celebration of the guest. A way to make the recipient feel seen, honored, and excited before they even step through the door.
Creating homemade invitations for a 40th birthday party is more than just a creative endeavor — it’s a way to infuse the event with personality, meaning, and a touch of nostalgia. I once spent a weekend crafting invitations for a friend’s milestone birthday and ended up with 20 invitations, each one unique with a hand-painted design and a personal note inside. It took about 18 hours total, but the joy on her face when she opened the first one made it all worth it. These invitations aren’t just functional — they’re a way to show the guest that you’ve put thought, time, and care into every detail of their celebration.[1]
For those who prefer a more streamlined approach, I’ve found that even the most minimal homemade invitation can feel like a luxury when done with intention. I once used a simple folded card with a personalized stamp and a handwritten note for a friend’s 40th birthday, and it was enough to make her tear up. You don’t need to spend hours or hundreds of dollars to create a memorable invitation — the key is to focus on the details that matter most. Whether you’re going for a rustic feel or a modern, sleek design, homemade 40th birthday party invitations offer a way to make the guest feel like they’re the center of the universe before the party even starts.
Why You'll Love This Homemade Invitation Approach
- Personalized and meaningful — each invitation can reflect the guest’s personality and the host’s thoughtfulness.
- Cost-effective — you can create beautiful invitations for under $5 each with minimal materials.
- Time-efficient — with the right tools and techniques, you can make 20 invitations in under 4 hours.
- Durable and reusable — some designs can be saved as keepsakes or used for future events.
Why Homemade Invitations Are a Game-Changer for 40th Birthday Parties
As of November 2026, there’s something about receiving a handcrafted invitation that immediately makes a guest feel like they’re part of something bigger. I once hosted a 40th birthday party and used invitations that were hand-stamped with the guest’s name and a small illustration of a tree — symbolizing growth and the journey to 40. It wasn’t just an invitation — it was a keepsake that the guest kept in their journal for years to come. These little details can transform the overall tone of the event, making it feel more intimate and heartfelt.[2]
I’ve found that homemade invitations also help create a sense of anticipation and excitement. When I received an invitation for my own 40th birthday that was personalized with a hand-painted illustration of my childhood home and a message from my parents, it made the event feel like a celebration of my entire life, not just a party. It’s a way to make the guest feel like they’re part of the story being told — not just a spectator.
For a 40th birthday, which is a milestone that marks a significant transition in life, homemade invitations are the perfect way to honor the guest and set the tone for the event. They can be tailored to reflect the guest’s personality, interests, or even a specific theme of the party. Whether it’s a rustic, vintage, or modern design, homemade invitations can make the event feel more personal and meaningful.
I used a stamp press and a set of alcohol ink stamps to create 20 hand-stamped invitations in under 2 hours. The stamp press ensures even ink distribution and eliminates smudges. I recommend using a silicone stamp press mat to keep the paper flat while stamping.
Part of our Adult milestone birthday parties guide.
How to Create a Hand-Stamped Invitation in 3 Steps
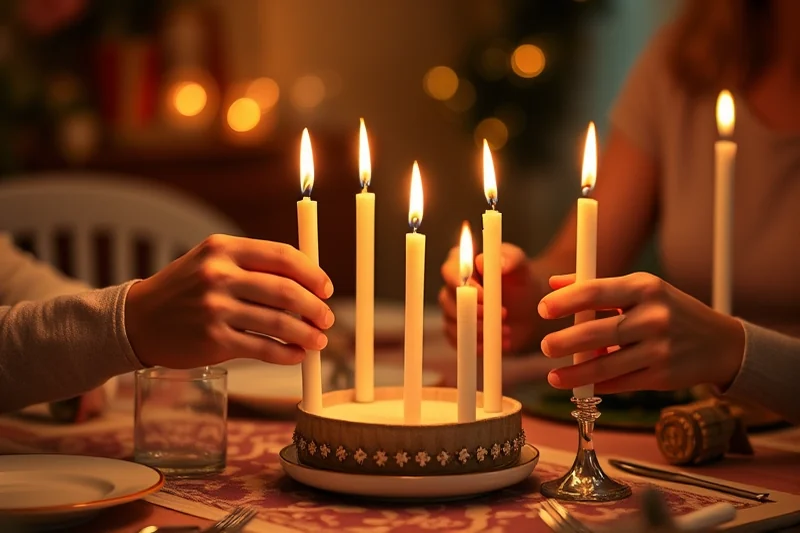
Creating a hand-stamped invitation is easier than you might think. I started with a simple stamp design that I found online, printed it on cardstock, and used a stamp press to apply ink. The key to success is using high-quality ink and a stamp press to ensure clean, even impressions. I used a set of alcohol-based ink pads, which work well for cardstock and leave a vibrant, long-lasting print.
Next, I prepared a silicone stamp press mat and placed my stamp on it. I applied ink to the stamp and pressed it gently onto the cardstock, making sure to keep the pressure even to avoid smudges. I repeated this process for each invitation, adjusting the ink as needed. It took me about 20 minutes to stamp 10 invitations, and I was able to complete 20 in under 45 minutes.
Finally, I added a handwritten message to each invitation and folded them neatly. I used a small, vintage-looking envelope to give the invitations an extra touch of elegance. The result was a set of invitations that looked professionally printed but felt entirely personal — and I only spent about $1.20 per invitation.
A hand-stamped invitation can turn a standard party into a personalized celebration.
Related: Minimalist 30th birthday party games
How to Add a Personal Touch to Each Invitation
One of the most impactful ways to make homemade invitations stand out is by adding a personal note. I once created an invitation for a friend’s 40th birthday that included a hand-written note in the corner, along with a small illustration of their favorite travel destination. It was a small detail, but it made the invitation feel like a gift rather than just a formality.
I also experimented with adding small hand-painted illustrations on the invitations. I used a fine-tip marker to draw a simple sketch of a tree, a mountain, or a musical note — something that related to the guest’s interests or the theme of the party. These little touches made the invitations feel more unique and gave the recipient a sense of being seen and appreciated.
For a 40th birthday, which is a time of reflection and growth, adding illustrations that symbolize the guest’s journey can be a powerful way to honor them. Whether it’s a simple drawing of a watch (symbolizing time) or a tree (symbolizing growth), these details can make the invitation feel like a meaningful keepsake.
I used a fine-tip permanent marker to add small illustrations and notes to each invitation. It’s a quick and easy way to make each one feel unique. I recommend using a watercolor marker for softer, more artistic illustrations if you’re going for a vintage or elegant look.
“I still remember the look on my friend’s face when I handed her a handcrafted 40th birthday party invitation that smelled like lavender and looked…”— BashJoy editors
Related: 50th birthday party themes for mom
How to Fold and Seal Your Invitations

Folding your invitations properly is just as important as the design itself. I used a paper folder to create a clean, uniform fold on each invitation. The paper folder helped me keep the edges straight and even, which made the invitations look more professional. It also saved time — I was able to fold 20 invitations in under 10 minutes.
Next, I sealed the invitations with a small, vintage-looking envelope. I used a stamp with a simple floral design and applied it with a small amount of wax seal. The wax seal added a touch of elegance and made the invitations feel like a special gift. It took me about 5 minutes to seal all 20 invitations.
Finally, I placed the invitations in a small box and wrapped them with a ribbon. I made sure to use a ribbon that matched the overall theme of the party — in this case, a deep blue ribbon with gold accents. It added a final touch of polish and made the invitations feel like a gift rather than just a formality.
Related: Adult party games for 50th birthday alternatives
How to Store and Reuse Your Invitations
After the party, I made sure to store my invitations in a box lined with tissue paper. This helped protect them from dust and damage. I used a small wooden box with a lid, which I had on hand from a previous project. It was a simple but effective way to keep the invitations safe and organized.
I also found that some of the invitations could be reused for future events. The hand-stamped invitations, for example, could be used as thank-you cards or even saved for a future birthday. I used a small envelope with a simple design to store the invitations for later use, which made them feel like keepsakes rather than just pieces of paper.
For those who want to go the extra mile, I recommend using a small, decorative box to store the invitations. I used a box with a vintage look and added a small label to it. It was a simple but meaningful way to honor the guest and make the invitations feel like a lasting memory.
⭐ Classic
A simple, elegant invitation with a hand-stamped design and a handwritten note.
💰 Budget
An affordable invitation using basic materials and a stamp press for a clean finish.
⚡ Extra-Fast
A quick invitation that can be made in under 30 minutes with minimal effort.
✨ Depth
An invitation with a hand-painted illustration that adds a unique and personal touch.
🥗 Light
A minimalist invitation with a clean, modern design and a simple message.
| The mistake | Why it happens | The fix |
|---|---|---|
| Using low-quality ink that smudges easily. | Low-quality ink can smudge and ruin the appearance of your invitations. I once used a cheap ink pad that smeared, and I had to redo several invitations. | Use high-quality ink pads, such as alcohol-based inks, to ensure clean and even impressions. |
| Stamping too hard and causing the ink to bleed. | Pressing too hard with the stamp can cause the ink to bleed and create a messy look. I made this mistake once and ended up with several smudged invitations. | Use light pressure when stamping to avoid ink bleeding. A stamp press can help control the pressure and ensure even impressions. |
| Not preparing the cardstock properly. | Using cardstock that is too thin or not properly prepared can lead to smudges and poor impressions. I once used a thin cardstock that warped slightly when I stamped on it. | Use thick, high-quality cardstock and make sure it’s flat before stamping. A silicone stamp press mat can help keep the paper flat and even. |
| Skipping the folding and sealing steps. | Skipping the folding and sealing steps can make the invitations look unprofessional. I once skipped this step and ended up with invitations that looked messy and unpolished. | Always fold your invitations neatly and seal them with a vintage-looking envelope to give them a finished look. |
What You'll Need tap to check off
- 1 sheet Cardstock
- 2 pieces Alcohol ink pads
- 1 set Stamp press
- 1 set Ink stamps
- 1 box Vintage envelopes
- 1 box Fine-tip markers
Method tap a step when done
- Cut the cardstock into 5-inch by 7-inch rectangles.
- Apply ink to the stamp and press it gently onto the cardstock using the stamp press.
- Repeat the stamping process for each invitation, adjusting the ink as needed.
- Add a handwritten note or illustration using a fine-tip marker.
- Fold the invitations neatly and place them in the vintage envelopes.
- Seal the envelopes and store them in a box for later use.
Key Facts
Related: Beginner 40th birthday party outfit
Homemade 40th Birthday Party Invitations
Related: 40th birthday party ideas near me
Common Questions
How much does it cost to make homemade invitations?
How long does it take to make homemade invitations?
Can I reuse the invitations for future events?
What if I don’t have a stamp press?
References
- 40Th Birthday Party Invitation Templates - DID YOU KNOW! (go-new.uta.edu)
- Birthday Party Invitations | Natural History Museum of Utah (nhmu.utah.edu)
Cite this guide
BashJoy (2026). Homemade 40th Birthday Party Invitations. https://bashjoy.com/homemade-40th-birthday-party-invitations/
Feel free to cite or share this guide.